This guide will help you set up a Raspberry Pi with Rasbian. Ready to do pretty much whatever you want.
What hardware do you need?
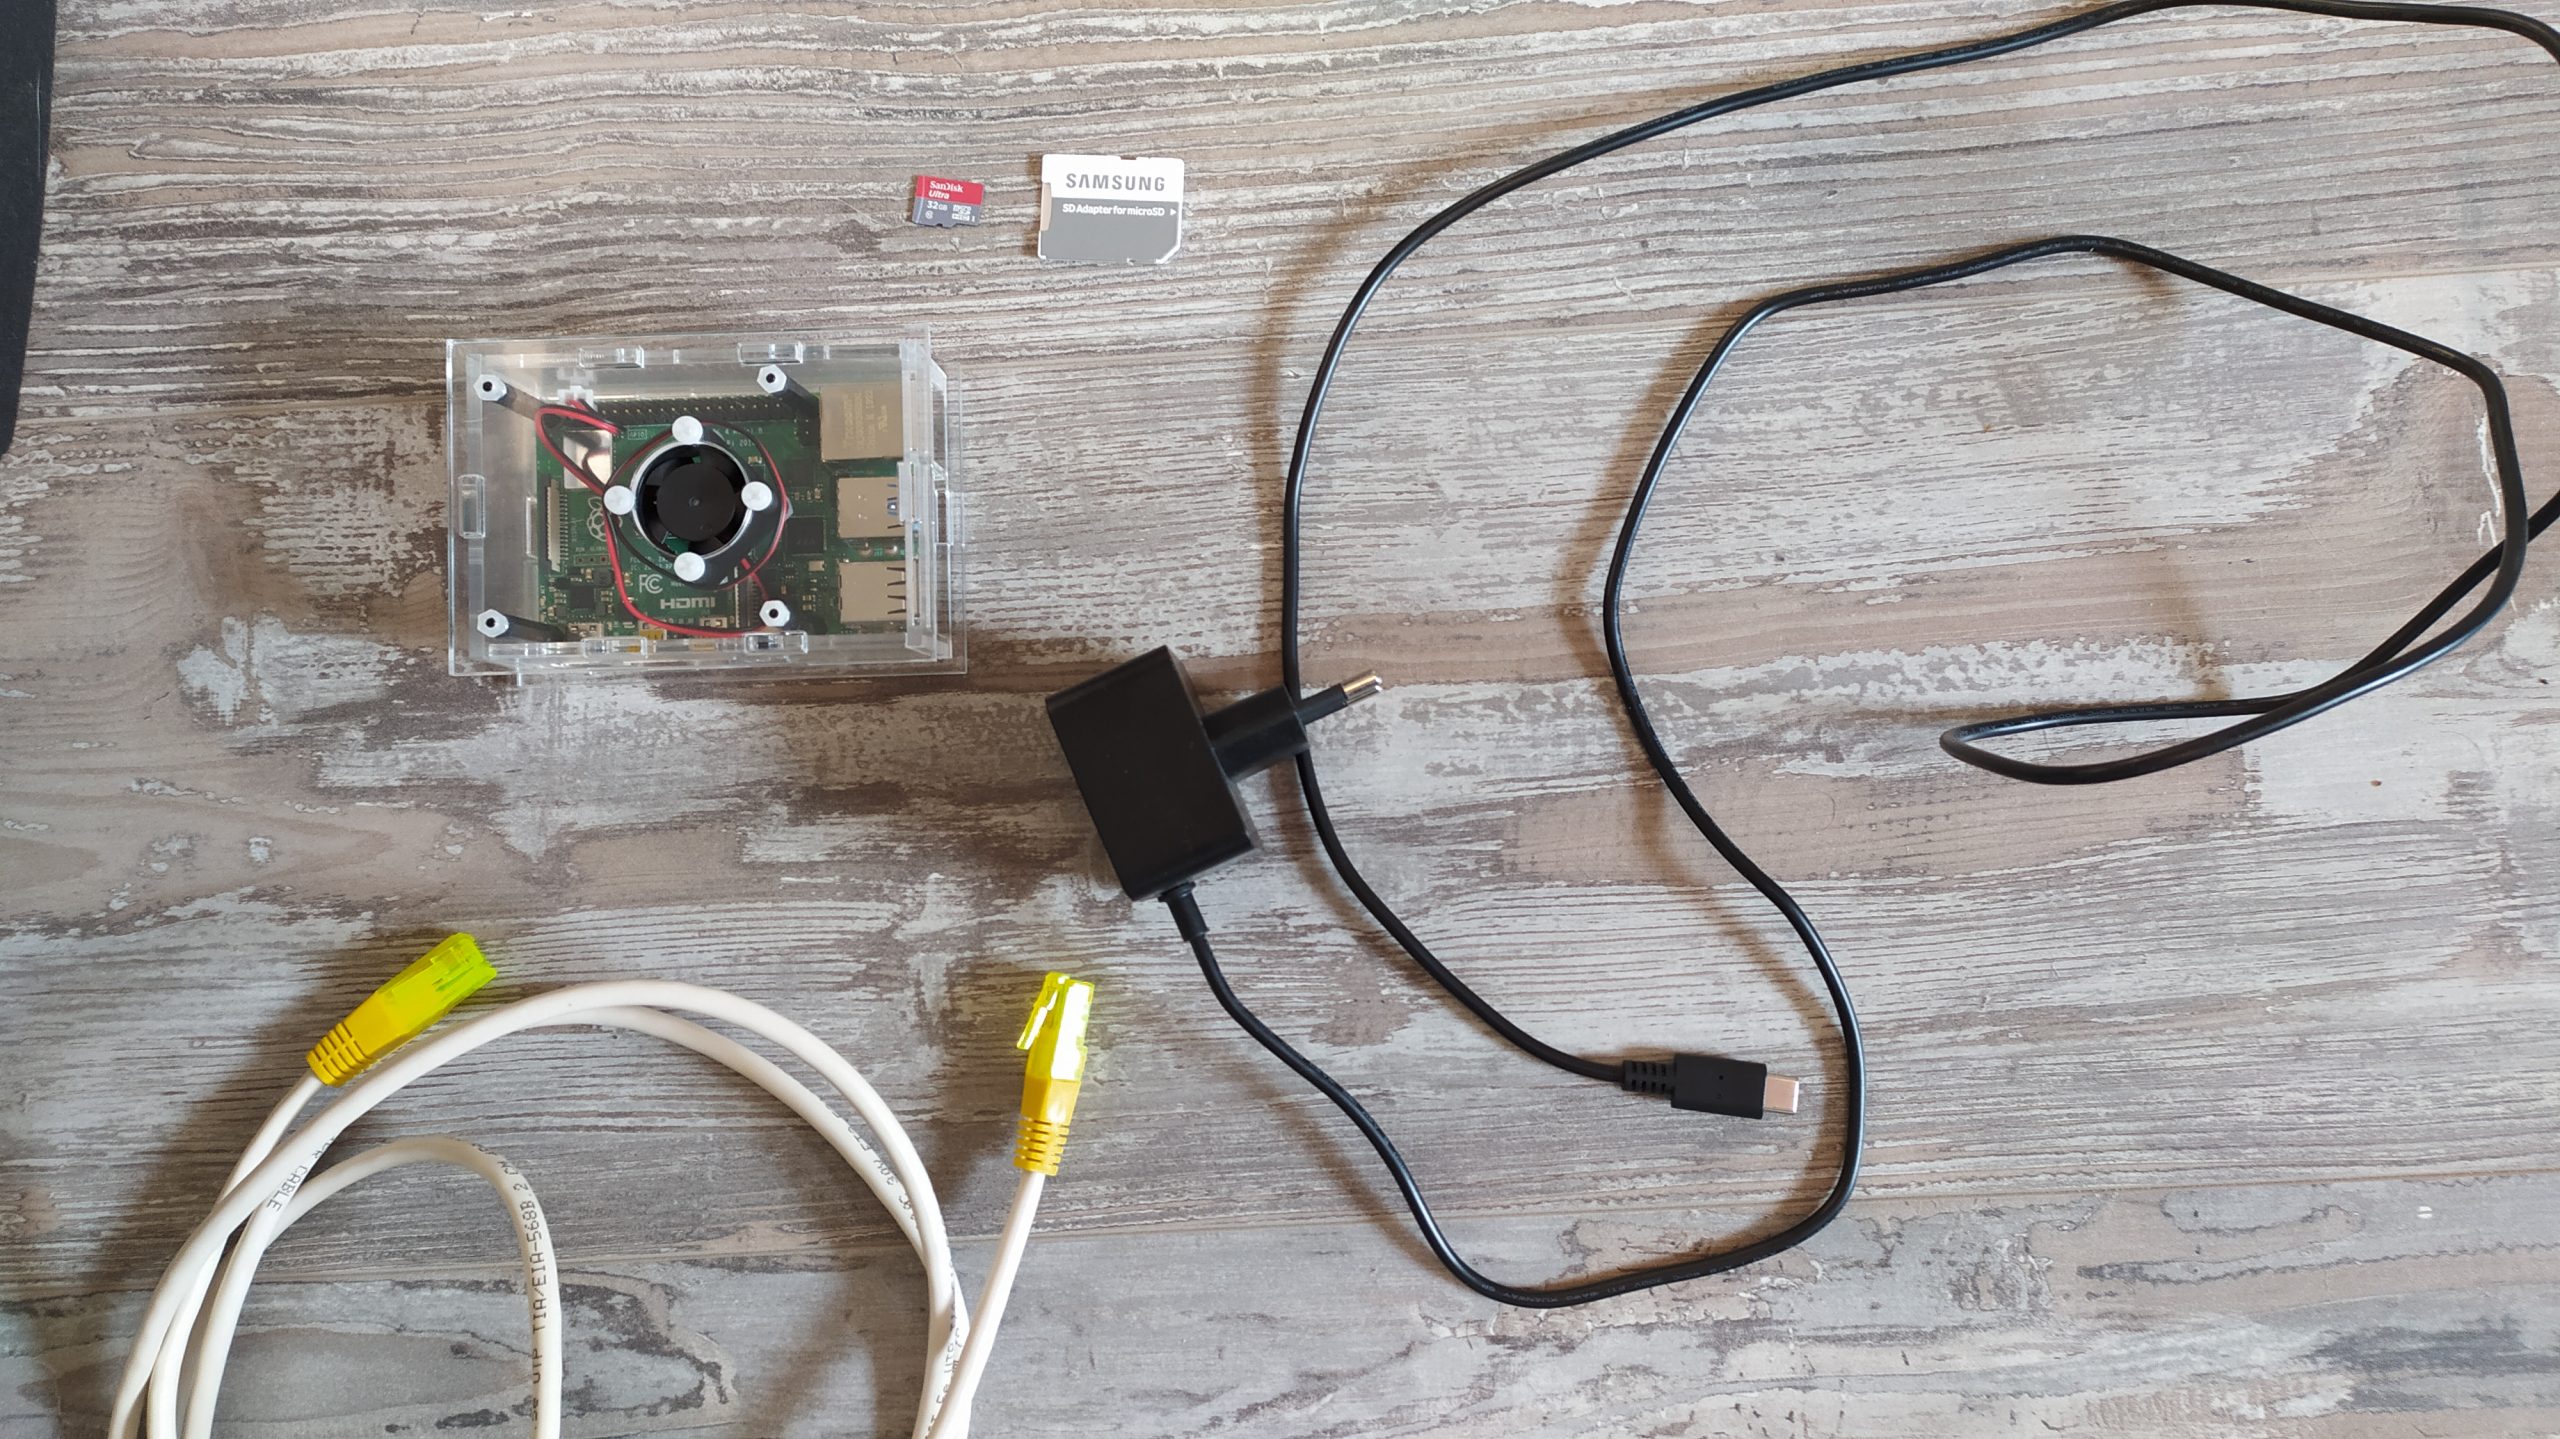
- First off a Raspberry Pi of course, this tutorial uses a 4B 4GB. And should also work on a Model 2B and 3B.
- Second I have a network cable. Wifi is available on since the 3B but wire always has a more stable connection, I will use a wire.
- A USB-C power source. This can get a bit tricky. Recommended is at least 2A with 5V. A normal smartphone adapter won’t give that. Using less will slow down your Raspberry. If you’re using a 2B or 3B you need micro USB instead of USB-c
- A micro SD card, at least class 10 for speed and with 8GB or more. The SD card will serve as the main harddrive for the pi. An micro SD adapter is also needed to install the image on the SD card.
- A Case. With the Pi4 I’d recommend one with a builtin fan, as it can get to hot for itself.
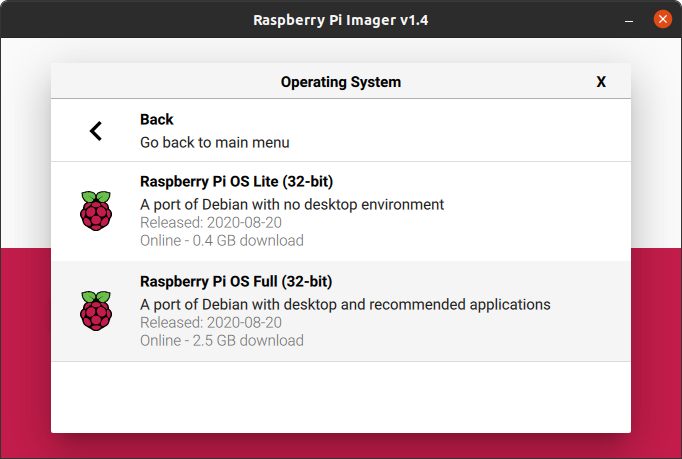
Installing Rasberry Pi OS Lite
In the past this was called Rasbian. I liked that name much better….
I also have a guide for installing Ubuntu on the Pi.
This guide will start help you set up a Raspberry Pi with Rasbian. And basic Pi configuration.

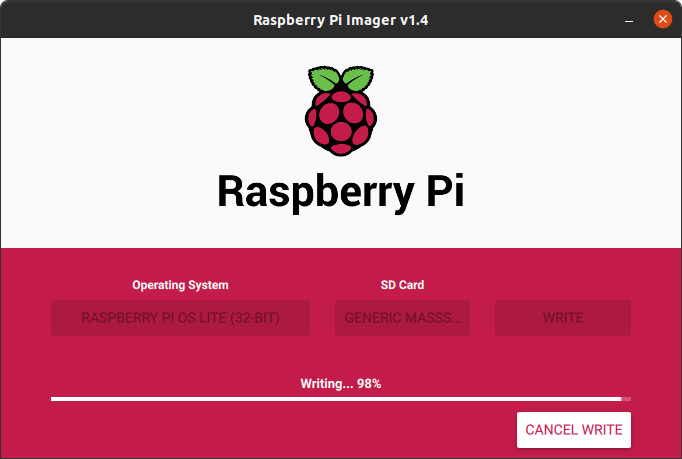
Flashing the image can take a while. You could set up all the wires and put things in place.
After the SD card is done
When the writing of the SD card is done. Create a folder named ssh in the root of the boot partition.
Also in the boot partition is a file called cmdline.txt. Open that, and at the end of the line add the IP you want to give the Pi. Usually you’re restricted to 192.168.1.x or 192.168.2.x but that depends on your router settings.
EXTSTING_SETTINGS=SETTINGS ip=192.168.x.xIf you need wifi place a file named wpa_supplicant.conf also in the boot partition. And add the following:
network={
    ssid="YOUR_SSID_WIFI_NAME"
    psk="YOUR_PASSWORD"
    key_mgmt=WPA-PSK
}
I haven’t tried this myself so more information here, The static IP probably won’t work with wifi.
Then plug in the SD card and powerup. Do wait 2~5minutes before actually trying. The Raspberry has to setup stuff for the first time. If after 20max you still can’t find an IP. The flashing of the SD card has gone wrong and you’ll have to restart.
Go to your own computer and open the terminal (or Putty for the windows users) Login with the command ssh [email protected].*.* Use the IP address you noted before. If it asks if you want to continue choose yes. and use the default password: raspberry Putty again will work a bit different.
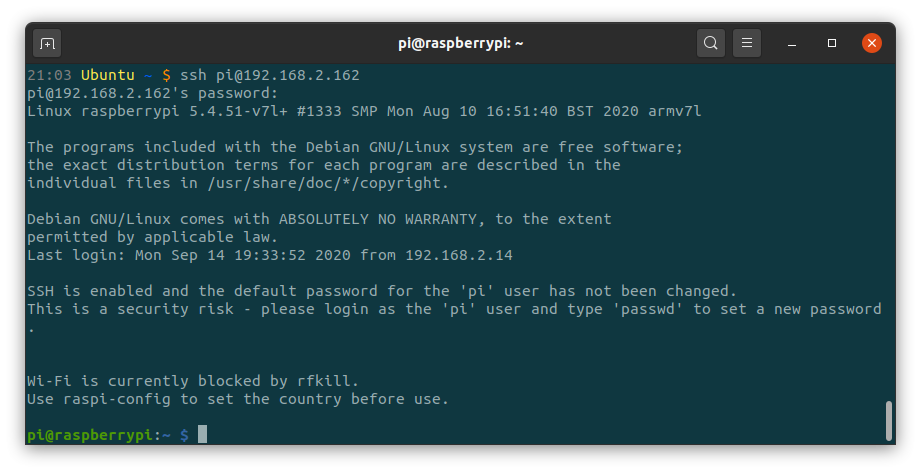
Global configuration
Now you are logged-in remote on the raspberry pi. Time to configure some stuff with the command sudo raspi-config.
On this menu we can configure some basic settings. Let’s change some settings.
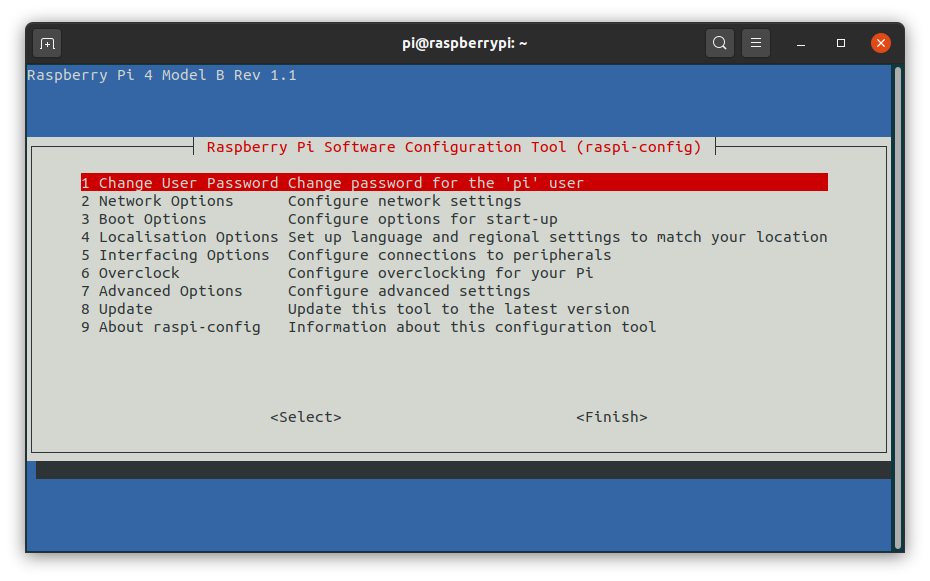
- Change User Password CHANGE THE PASSWORD. Longer is better and safer
- Network options
N1 Hostname the name of your Raspberry in your network. I named mine pi-webserver. Not required. It’s just a label. But useful if you got multiple Raspberry’s running. - Boot options
B1 Desktop / CLI Chose the ‘Console Autologin’ or ‘Console’ option. Don’t choose auto login if someone else might have physical access to the pi. Desktop will just waste power.
B2 Wait for Network at Boot Just turn this off to be safe. - Localisation Options Here you can change the timezone to your current one. You could change the language of the PI and the keyboard layout if you need to. Keep in mind I will be using English.
- Interfacing Options we don’t need this
- Overclock Only for the Pi 2B, Set this to the highest setting. It won’t hurt and will make the Pi a faster.
- Advanced Options This will be a bit more.
A1 Expend Filesystem Run this. No need to reboot immediately.
A3 Memory Split Set this to 16. Because we don’t have a interface we won’t need memory for that. - Update Run this is should not hurt. It’s only to update the
raspi-configtool.
When this is finished the pi might download some language packs. It it doesn’t reboot. you have to do it yourself. sudo reboot now.
Wait about a minute and login in again like before. But with the new password
Updates
This might take a while but a fresh install it’s highly recommended to update.
sudo apt update && sudo apt upgrade -yNow we update all default installed software. If the image is old or hasn’t been updated in a while it might take a long time. The date of the image is in the file name of the downloaded image.
At times It might appear to hang. It Unless it’s stuck on one thing 15 minutes it’s probably fine. Give it an 15 to 30 minutes. Else pull the plug.
When it’s done reboot again just to be sure: sudo reboot now
You now have a Raspberry Pi ready for use.