In this guide we are going to install a webserver (nginx). For those who are bit familiar with webservers you might wonder why we are not using apache? I myself are more familiar with Apache but Nginx just has better performance. And on the not so powerful pi that is important.
Install Nxing
To start we just plainly install nginx.
sudo apt install -y nginxCheck the version nginx -v it should be version nginx/1.18.0 or higher

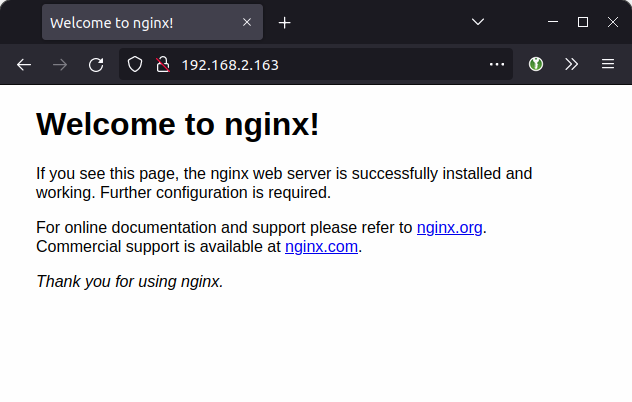
To test if it works enter the IP address in the browser. You should see this page.
If you see an error most likely IPv6 isn’t supported. Open the nginx config file sudo nano /etc/nginx/sites-enabled/default.
At the top you should see these lines
    listen 80 default_server;
    listen [::]:80 default_server;
Change them to:
    listen 80 default_server;
    #listen [::]:80 default_server;
Save then restart nginx.
sudo nginx -t && sudo service nginx reloadThen test the page again in the browser.
Setting up a site with php and url
First we will do some global settings open: sudo nano /etc/nginx/conf.d/90-pi-custom.conf
Add the following line, we increase the allowed upload sizes.
client_max_body_size 64M;Note: for the example I use example.local replace that with the url you want to use. If you don’t have the url setup yet you can add it to you own host file. Or instead of the url use the IP-address of the Pi.
We will create our own vhost files. PS I’ll be using example.local but use whatever you intend to use. Create the vhost file: sudo nano /etc/nginx/sites-enabled/example.local.conf
server {
    listen [::]:80;
    listen 80;

    server_name example.local www.example.local;
    root /var/www/example.local/public_html;

    index index.php index.html;

    #Force no-www
    if ($host = www.example.local) {
        return 301 https://example.local$request_uri;
    }

    location / {
        try_files $uri $uri/ =404;
    }

    location ~ .php$ {
        include snippets/fastcgi-php.conf;
        fastcgi_pass unix:/var/run/php/php8.2-fpm.sock;
        fastcgi_intercept_errors on;
        fastcgi_buffers 16 16k;
        fastcgi_buffer_size 32k;
    }
}
*note make sure you add the correct php version. Here I’m using php8.2.
Next create the folders needed. Set the rights of those files and add a test page.
sudo mkdir -p /var/www/example.local/public_html
sudo touch /var/www/example.local/public_html/index.php
sudo chown www-data:www-data /var/www/example.local -R
sudo nginx -t && sudo service nginx reload
In the main file add sudo nano /var/www/example.local/public_html/index.php
<?php
phpinfo();
To test the url example.local you need to add it to your host file. Depending if you’re on Windows, Mac or Linux the instructions are different. See this guide: How to edit your hostfile
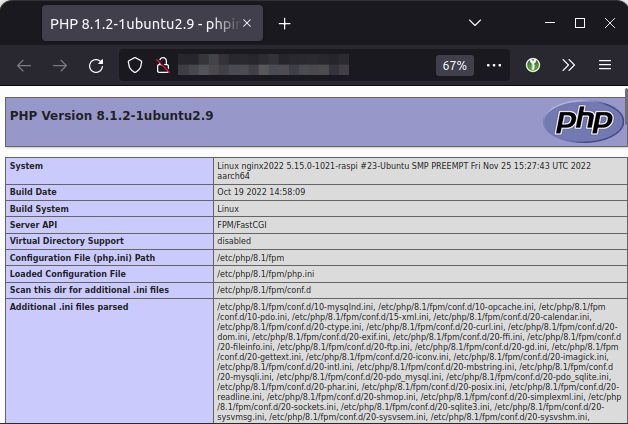
Now go the the url and you should see this:

Now we have a basic and functioning webserver with php.
For security sake delete the index.php file
sudo rm /var/www/example.local/public_html/index.phpCreating a new user for Nginx
So far we use sudo for pretty much everything. This is fine.
After the initial setup most of the work has to be done in /var/www/*. These files are owned by the www-data user. This is fine but it can be a bit annoying when editing files with a different user.
Either the owner is the www-data user or it’s the user you use to login in (like the pi user).
So we’re going to create a new user assign it as the nginx user. Then we’lluse that user going onward to login as that user when we’ll want to change things to the sites.
We will not change it to the pi or ubuntu, because those users have sudo access. That’s a huge security risk.
Create a new user
Before we create the user we are going to check the current users to see if it does not already exists.
cat /etc/passwdWith that clear let’s create the user:
sudo adduser deploymentFill in the password, the rest of the questions are optional.
Assign this user to Nginx
In /etc/nginx/nginx.conf on line #1 change the user.
#user www-data;
user deployment;
And change the user for php-fpm (If you’re using php-fpm ?)
Create a file in /etc/php/8.2/fpm/pool.d/ (check the php version)
I suggest something like zzz-custom-user.conf so it’s loaded last. To that file add.
user = deployment
group = deployment
listen.owner = deployment
listen.group = deployment
Next reload everything, agian check php version.
sudo nginx -t && sudo service php8.2-fpm restart && sudo service nginx restartFinally change the owner of the webfiles
sudo chown deployment:deployment /var/www/ -RYou should be done changeing the nginx user to deployment. Open a new terminal and try to login to your Pi using this newly created user: ssh [email protected] It will ask for the password, but you should be able to login. If you want you can set you ssh key for the deployment user.
Also keep in mind if you had cronjobs on the previous user you should also move these to the new user. (We haven’t setup cronjobs in this guide).
You’re Nginx setup is now done and you are ready to add sites to it.